¶ Sales Order
¶ Usage
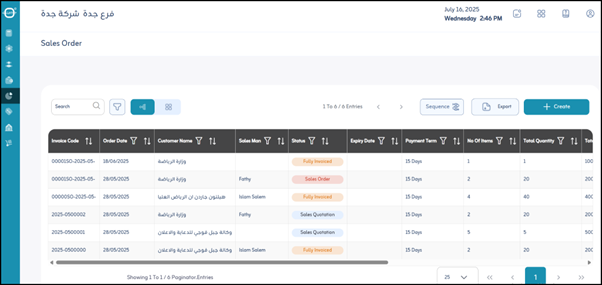
The Sales Order screen is a central tool in any sales system.
It is used to document a customer’s intent to purchase products or services.
A Sales Order acts as an internal confirmation of the purchase before issuing the final invoice.
This screen allows you to view, create, and manage orders, define customer and vendor details, and convert confirmed orders directly into sales invoices.
¶ Prerequisites
- The user must have the necessary permissions to access the Sales Orders module.
- The sales order numbering sequence must be pre-configured to enable creating new orders.
- Customers and products must be pre-defined in the system to ensure full data integration.
¶ Display and Search
When you open the “Sales Order” screen, you will find a list of all existing sales orders.
You can use search and filter options to locate specific orders:
- Name: Search by sales order name or description.
- Expiration Date: Filter orders based on their expiration date.
- Order Date: Filter orders by creation date.
- Customer: Filter by customer name.
- Vendor Name: Filter by the assigned sales representative.
- Payment Terms: Filter by the applied payment terms.
- Status: Filter by the order’s current status.
- View: Apply search and filter criteria to display matching results.
¶ Sequence Settings
Defines how sales orders are automatically numbered in the system.
- Allowed:
Specifies whether manual numbering is permitted or the system uses automatic sequencing only.
Sequence Applies To:
- Company: Numbering is shared across the entire company.
- Branch: Numbering is specific to each branch.
- Unit: Numbering applies to a specific organizational unit.
- Screen: Numbering is applied only to this module’s entries.
Sequence Type:
- Annual: Resets numbering to 1 at the start of each fiscal year.
- Monthly: Resets numbering to 1 at the start of each month.
- Daily: Resets numbering to 1 at the start of each day.
- Continuous: Continues incrementing without resetting.
¶ Actions and Export Options
-
Export:
Export displayed sales order data to Excel or PDF for reporting and analysis. -
Actions:
- Go to Sales Invoice: Create a new sales invoice directly from the sales order, automatically transferring all details.
- Details: View full order details in a separate screen.
- Print: Print a copy of the sales order (usually PDF format).
- Note: You can print a sales order as a quotation, using the same data in an official offer format for customers.
¶ Fields after Clicking “Add New”
When you click “Add New”, a form will open to enter the details of a new sales order.
Fields are organized into sections for clarity and structure.
¶ Master Data
- *Order Date :
The date the sales order was created or received. (Mandatory) - *Expiration Date :
The date after which the order expires or requires reconfirmation. - Description:
Optional detailed description or notes regarding the sales order. - Terms and Conditions:
A text field for adding order-specific terms, such as warranty, return, or delivery conditions.
¶ Customer Data
- *Customer :
The customer placing the order (selected from registered customers). (Mandatory) - *Currency :
The currency in which the order is made (e.g., SAR, USD). (Mandatory) - *Rate :
The currency exchange rate if different from the base system currency. (Mandatory) - *Pricing Policy :
The pricing policy applied to products in this order. (Mandatory) - *Payment Terms :
The payment terms agreed upon with the customer (e.g., Immediate Payment, 30 Days Net, 50% Down Payment). (Mandatory)
¶ Vendor Information
- Sales Representative:
The salesperson responsible for this order. - Attachments:
Upload supporting files such as quotations, contracts, or related documents.
¶ Fields after Clicking “Add Line” (Order Items)
When adding products or services to the order, a table of item details appears:
- Barcode:
Enter the product barcode to auto-populate item details. - Item Code:
Identification code for the product or service. - Item Description:
Product or service name or description (auto-filled from item master data). - Unit of Measure:
The measurement unit (e.g., Piece, Carton, KG, Liter). - Quantity:
The ordered quantity for the item. - Price:
Unit price of the item (auto-filled based on the selected pricing policy). - Subtotal:
The total before discounts and taxes (Quantity × Price). - Discount (%):
The discount percentage applied to this item. - Discount Amount:
Calculated discount value (Subtotal × Discount Percentage). - Total After Discount:
Subtotal minus the discount amount. - VAT:
Applied VAT percentage rate. - Tax Amount:
Monetary value of the VAT. - Grand Total:
Total after adding taxes to the discounted subtotal.
¶ Actions
- Save:
After completing all required fields, click “Save” to record the new sales order in the system.